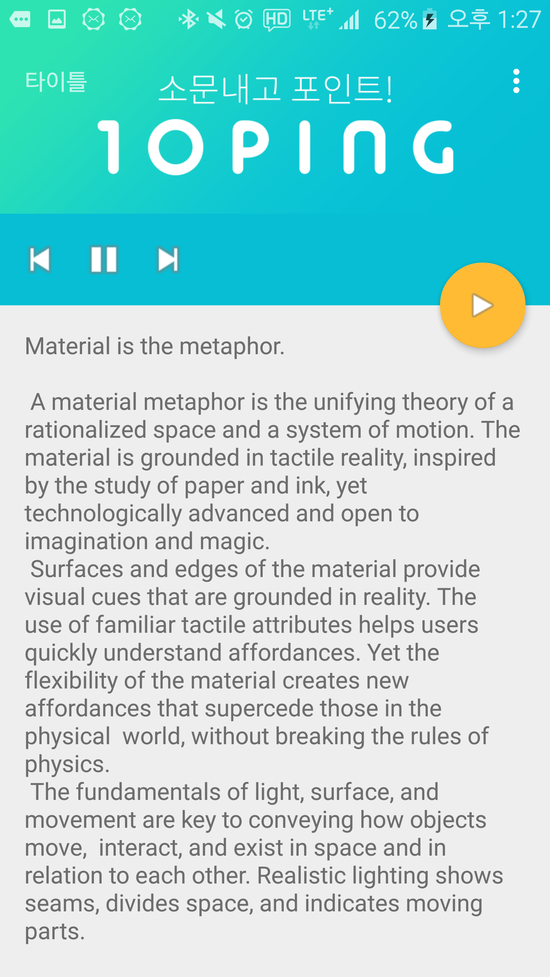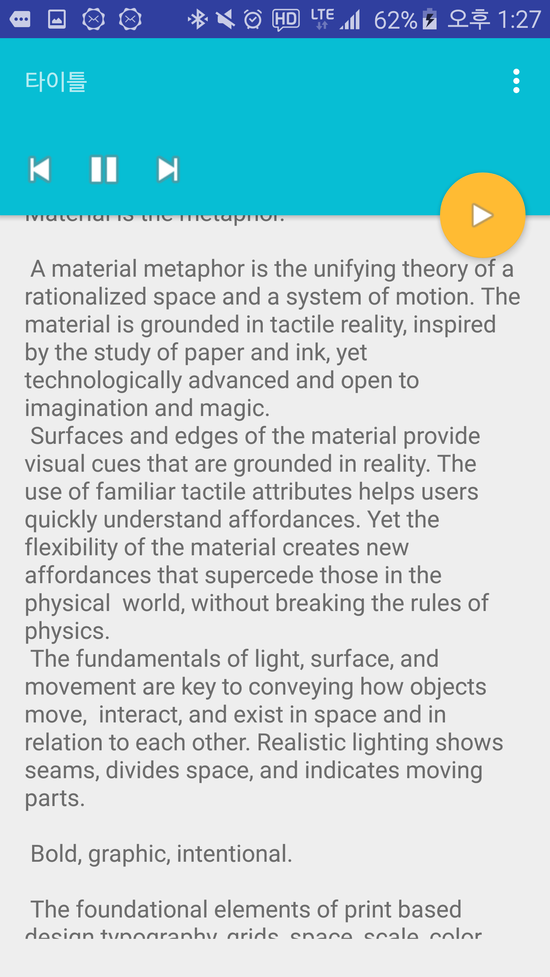


기본적인 레이아웃은 위와 같다.
스크롤뷰 위에는 이미지뷰와 별도의 플레이어 컨테이너가 있는데 스크롤뷰의 스크롤에 따라 이미지뷰는 사라지고 플레이어 컨테이너만 상단에 고정되게 하는 레이아웃이다
기본적인 소스 코드단은 건드릴게 없게 레이아웃 xml은 다음과 같다
<?xml version="1.0" encoding="utf-8"?>
<android.support.design.widget.CoordinatorLayout xmlns:android="http://schemas.android.com/apk/res/android"
    xmlns:app="http://schemas.android.com/apk/res-auto"
    xmlns:tools="http://schemas.android.com/tools"
    android:layout_width="match_parent"
    android:layout_height="match_parent"
    android:fitsSystemWindows="true"
    tools:context="kr.tenping.test.ScrollingActivity">

    <android.support.design.widget.AppBarLayout
        android:id="@+id/app_bar"
        android:layout_width="match_parent"
        android:layout_height="wrap_content"
        android:fitsSystemWindows="true"
        android:theme="@style/AppTheme.AppBarOverlay">

        <android.support.design.widget.CollapsingToolbarLayout
            android:id="@+id/toolbar_layout"
            android:layout_width="match_parent"
            android:layout_height="match_parent"
            android:fitsSystemWindows="true"
            app:contentScrim="?attr/colorPrimary"
            app:expandedTitleTextAppearance="@style/CollapsingToolbarLayoutExpandedTextStyle"
            app:collapsedTitleTextAppearance="@style/CollapsingToolbarLayoutExpandedTextStyle"

            app:layout_scrollFlags="scroll|exitUntilCollapsed">

            <ImageView
                android:id="@+id/backgroundImageView"
                android:layout_width="match_parent"
                android:layout_height="200dp"
                android:fitsSystemWindows="true"
                android:scaleType="centerCrop"
                android:src="@drawable/top_image"
                app:layout_collapseMode="parallax"
                app:layout_collapseParallaxMultiplier="0.7"/>
            <android.support.v7.widget.Toolbar
                android:id="@+id/toolbar"
                android:layout_width="match_parent"
                android:layout_height="?attr/actionBarSize"
                app:layout_collapseMode="pin"
                app:popupTheme="@style/AppTheme.PopupOverlay" >
                <TextView
                    android:layout_width="wrap_content"
                    android:layout_height="wrap_content"
                    android:text="타이틀"/>
            </android.support.v7.widget.Toolbar>

        </android.support.design.widget.CollapsingToolbarLayout>

        <RelativeLayout
            android:id="@+id/top_view"
            android:layout_width="match_parent"
            android:layout_height="60dp"
            android:layout_gravity="bottom"
            >
           <ImageView
               android:id="@+id/btn_media_previous"
               android:layout_width="wrap_content"
               android:layout_height="wrap_content"
               android:layout_centerVertical="true"
               android:layout_marginLeft="10dp"
               android:src="@android:drawable/ic_media_previous"/>

            <ImageView
                android:id="@+id/btn_media_pause"
                android:layout_width="wrap_content"
                android:layout_height="wrap_content"
                android:layout_centerVertical="true"
                android:layout_toRightOf="@+id/btn_media_previous"
                android:layout_marginLeft="10dp"
                android:src="@android:drawable/ic_media_pause"/>

            <ImageView
                android:id="@+id/btn_media_next"
                android:layout_width="wrap_content"
                android:layout_height="wrap_content"
                android:layout_centerVertical="true"
                android:layout_toRightOf="@+id/btn_media_pause"
                android:layout_marginLeft="10dp"
                android:src="@android:drawable/ic_media_next"/>
        </RelativeLayout>

    </android.support.design.widget.AppBarLayout>
    <include
        android:id="@+id/scrollView"
        layout="@layout/content_scrolling" />

    <android.support.design.widget.FloatingActionButton
        android:id="@+id/fab"
        android:layout_width="wrap_content"
        android:layout_height="wrap_content"
        android:layout_margin="@dimen/fab_margin"
        app:backgroundTint="@android:color/holo_orange_light"
        app:backgroundTintMode="multiply"
        android:src="@android:drawable/ic_media_play"
        app:layout_anchor="@id/scrollView"
        app:layout_anchorGravity="top|right|end" />


</android.support.design.widget.CoordinatorLayout>
돌아가는 구조는 CoordinatorLayout을 이용하여 뷰의 동적인 모습을 구현하는 방법이다
전체소스코드는 파일로 첨부함
'Android' 카테고리의 다른 글
| Intent를 이용한 카카오톡 공뷰하기 (0) | 2016.07.12 |
|---|---|
| ValueAnimator 를 이용한 색상 변경 애니메이션 (0) | 2016.07.12 |
| WebView <input type="file"> 처리방법 (0) | 2016.07.12 |
| Webview의 loadData와 loaddatawithbaseurl 의 차이점 (0) | 2016.07.12 |
| CoordinatorLayout.Behavior 를 이용한 동적 레이아웃 (0) | 2016.07.12 |
 Test (1).7z